Monday, February 20, 2012

Our First Failure

February  2011
 
O no, our first admitted house failure.  I came home from work on Monday and was watching TV on the couch.  While I was watching* I heard an omnious sound that seemed to be cracking coming from the dining room.  I turned off the TV and raced into the room.  There carefully looking at the ceiling I started noticing two hairline cracks that were not there before.  It could only mean one thing, our chandelier that had been up for nearly 24 hours was cracking the ceiling.  


Your first immediate reaction is GET IT DOWN, but I was alone in my house and was kinda hopeless.  I removed everything off the table and started assembling the tools.  When Josh arrived home an hour later, the longest hour of my life.  I attempted to tell him as calmly as possible. Of course, in my head, I had a mental image of our dining room covered in lath and plaster dust everywhere, furniture ruined, tears.... you get the picture.  Josh agreed we needed to get it down that night so at 6:30pm we went to work.  We hurried and turn off the breaker, grabbed the ladder and started to unhook the chandelier.  Thirty minutes later our brand new, super beautiful, and excited about chandelier laid on the ground.  After that, we did some test drills to find our why it was cracking.  We soon realized it was exactly what we had feared.  The prior light's mounting bracket was not screwed into the structure it was only screwed into the lath. This was fine for the 2lb boob lamp but would in no way hold our 50lb chandelier.   We felt like idiots.  We assumed that in the center of a room there would be a joists and that the prior mounting bracket would be on it.  There is actually no joist in the center of our dining room.... now what?

 
The next weekend, Josh engineered a solution guaranteed to hold up not only the chandelier but also a large silver-backed ape swinging on it.  We went upstairs in the attic and installed a 2'x4' between our two joists to act as a bridge.  We place all thread rods through the 2'x4' and through the ceiling in the dining room and mounted the bracket to it.  Just to be sure we marked all the old cracks in the ceiling and then installed the chandelier back.  Good news, it was quicker the second time, bad news it still weighed a ton. For the next week we watched the cracks to see if they grew.  They did not, and I did not hear anything else from the dining room.  We patched the cracks and painted and pretended like it had never happened.  Except I just told everyone on the internet, and everytime a contractor goes in our attic they say-- what's with the 2x4?


*side note for everyone, I tend to watch TV at an alarmly quiet level-- seriously like level 8, I am half deaf (no hearing in the left) and this makes it even weirder. But I swear I hear it better if it's lower.  This annoys Josh who needs it at level 25 which feels insane to me.

Sunday, February 12, 2012

Let There Be Light... And Bling

February 2011

After Christmas I started to become alarmed that we appeared to be starting a trend.  A trend of purchasing large items in big boxes and leaving them fully packed in our dining room.  Procrastination should probably be a new years resolution.  The first box was our dishwasher that spent three months in our dining room before we installed it.  Now, we had a very large box containing our dining room chandelier.  My parents gave it too us in early December as a Christmas present.  Late January marked over a month in our dining room and I decided it was time.
 

My parents purchased our whimsical chandelier from Pottery Barn.  The decision was tough, I looked at thousands before I gave into this one.  Most felt way too formal for our small little cottage, others felt to rustic. This one grew on me each time I look at it.  It was in no way historically accurate to our house, however, it provided the appropriate level of bling mixed with casual natural appeal. I unwrapped it and realized that all the crystals do not come assembled.  At first, I was a little frustrated I was looking at easily 200 crystals that had to be screwed on to every surface of the chandelier, but as I started going about it, I actually appreciated it.  We probably used half of what came with it, a girl can only take so much bling! 
 
 
Josh and I moved out the table, shut off the breaker and went about installing our first big light fixture in the house.  We took down the 70's flush mount that I like to call 'boob light' (you know what I am talking about... round glass dome with a shiny pointy decorative metal knob in the center).  After this was done, we measured how long we needed the chain and proceeded to remove the extra links.  What I mean by this is that Josh attempted to pry the chain open to remove the extra links only to discover that this was impossible. Pottery Barn your directions state "remove extra links until desired length is achieved" I am not actually sure who they thought could do this, maybe the hulk.  We pulled and pryed with multiple tools until we gave up and actually cut the links with our sawzall, take that!  

After that our next task was for one person to hold the extremely heavy chandelier while standing on a ladder, while the other person wired it together.  Mind you this was about 50lbs and there is no real place to hold it given its about 4' around and surrounded by pointy crystal covered branches. This was hard, way hard, our old wires are not secured to anything (no junction box) so they like to slip back into the ceiling if your not careful. Eventually, after about 30 minutes and some seriously sore arms we got it up.  Flip the breaker back on and.... LET THERE BE LIGHT.  This thing was seriously gorgeous when the light was on.  It throws great light around the whole room and the crystals almost turn into mini lights.  We were very proud and cooked a celebratory dinner to eat underneath.  Our dining room felt completely transformed.  Actually pretty painless considering it only look us about 2 hours.

Tuesday, January 24, 2012

Shameless Self Promotion

I really don't dedicate enough time to this blog, the problem is I am usually doing the work you are reading about, or I am traveling, or working so I can pay for these misadventures.  It's horrible and I feel bad, but I still feel like I can ask all of you for a big favor. 


I decided to enter our small house to the This Old House reader curb appeal contest!  There isn't a cash prize or anything but there is bragging rights and a feature in the magazine (swoon).  I won't lie this vain little girl really wants her house in a magazine!

Please go to the link below and slide the bar to 100 and submit.  You can do this once a day... so if you have spare time please vote away!


Now, I have not covered our exterior remodel in the blog world since it was done last summer so you can view this as a teaser also.

Wednesday, January 11, 2012

Built-In Finishing Touches

February 2011

After several weeks of stripping... the built-in.  I moved on to sanding, patching, and painting the lower portion.  This got a healthy three coats of Bone White (see earlier blog for color information).  I also bleached all the drawers down and put new cork liners in the bottom.  Apparently, I am not only a DIY maven but also apparently a clean freak.   After the drawers were lined I installed some brand new knobs I got at Restoration Hardware.  These are amazing, they are real solid oil rub bronze knobs that weigh about a pound each.  I love that they are slightly over sized and remind me of the talking door knob in Alice in Wonderland.  
 

The lower portion went so quickly and easily I felt super successful and excited about the end of the project.  Then I started staining the top.  This took a few tries to get right.  I was trying with a brush at first and it just didn't seem to be going on evenly.  Each time I would sand all the stain off and start again.  Finally I discovered staining with a rag... this was much more successful and after three coats I felt pretty good about my staining jobs.  The second to last step was applying a sealer... I debated between varnish, lacquer, poly or just an oil treatment.  The Internet is a warren of conflicting information, after hundreds of articles and blog entries I gleamed this: varnish is REALLY hard... you should be a professional or at least have a spray gun for it.  Oil would require me 3-4 times a year apply a fresh coat to protect the wood from sun, water, and whatever I left on top.  Apparently lacquer can also go yellow and eventually chip off... urgh.  So I decided good old fashion poly would be my trick. 
 

Of course, I had similar issues with the poly.  I was tentative and putting it on way too light.  The issue with poly is when you are applying it to the surface it looks horrible.  No matter what you do there is brush strokes and small air bubbles.  What I eventually learned was if you apply it thick enough then these spread out and go away as it dries.  After a few different methods I settled on foam brushes. These did not leave brush strokes and after three coats of poly I finally had to admit, I might be done.   I touched up the paint around the top and called it a day.  Needless to say this was a labor of love.  It took we two months and way too long to be proud of.  I think a capable person could do this in about 5 days but in the end I feel like the result was pretty professional and I will admit to running my hands along the glossy top every time I pass it!
 

Saturday, January 7, 2012

Stripping.... A New House First


 January 2011
 
After the holidays.  We were all a little whipped.  Josh and Gus took a well deserved rest.  I on the other hand, seemed to be itching for even more work. sick? I decided to take on our dining room built-in.  Ever since we bought the house I was thinking about stripping it back to bare wood and staining it.  Most of the houses in our neighborhood are older then our house.  These houses are all filled with beautiful unpainted woodwork that I have been very jealous of.

I decided I would start with the top of the built-in and go from there.  The most interesting and frustrating part was that someone had covered the top of the built-in with contact paper.  Contact paper with a fake wood grain.... yay it was a trip.  What was not a trip was the fact that it was REALLY stuck to the cabinet.  It took me a whole day just to peel it off in small centimeter long strips.  Once I got to the painted surface I started putting on the stripper.  I painted it on and covered it with plastic wrap and left it for 24 hours.  When I came back the next day.  I was able to remove two-three layers of the paint.  Unfortunately, there was another two layers of paint under that!   This was going to be slow going!


Once you start a project you can't stop.  I learned from my first pass and thickly covered the wood this time. Around this time, I also realized my built-in had always been painted.  There was no stain or varnish as I got down.  I worried about the inaccurancy of me stripping this bare.  Did houses in the 1920's even have wood showing?  At the same time, I was looking a one solid 8 foot long 1" thick slab of beautiful old growth douglas fir with absolutely no knots or grains. In the end, my love for wood won out.  I decided to compromise. I would strip and seal the top of the buit-in but leave the bottom painted.

Two weeks, and three passes with the stripper and I had removed all the paint from the top of the cabinet.  I would not recommend this project to most people.  I have what is often considered an obsessive attention to small detailed projects.  In fact, I often get overwhelmed with the big picture, so this worked great for me.  Everyday afterwork I stripped a small segment and applied more stripper to sit overnight.  Josh understandably had no interest in taking on this mountain and left me to it.

Friday, December 23, 2011

A 2010 Christmas

December 2010
 
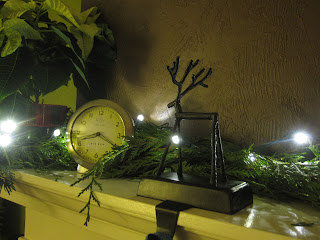
So for those of you coming into this blog a little late.  I figure I should remind people that I have started at the beginning of our adventures.  This means we are only slowly moving closer to present day.  In the wonder that is my procrastination and random happenstance we are now exactly a year out in my projects.  At this time last year, we had completed our small kitchen reno, our outside landscaping, painted our dining and family rooms and done numerous other small and large projects behind the scenes projects to get us to this point.  We decided to take it easy through late November and December as we travelled to see our families and celebrated Josh's brothers wedding in Mexico.
 

I figured if 2011 Christmas is upon us, what better time then now to show our small but in many way momentous first Christmas in our own home.


I look forward to speeding through 2011 projects and getting you caught up and hopefully embrace the new year and blog more often.  Thanks for the reads... please 'follow' me if you can... purely for my own self esteem.  Please have an amazing year my friends for we are indeed truly blessed!
 

Friday, December 9, 2011

Yard Redemption

October 2010
 
After our planting trip, Josh and I stepped it up and pulled some long days to turn up the soil and get the plants in the ground.  We laid it all out and spent an entire day planting, mulching and laying the stones.  By 6:00 pm it was getting dark and we called it a night.  Step one was complete and we had unearthed our house from behind the rhodies.  We felt satisfied to go into the holiday season with a fresh look outside.
 

Also, on a similiar landscaping note we added two 'street trees,' these reside in our planting strip between the sidewalk and the road.  We are the only house on the entire block without street trees and while I enjoy the sunlight, it also makes us look a little bare. 


In the Spring, Josh and I purchased a dwarf Bing Cherry tree, in the Fall, we added a hybrid Cherry tree, which had four separate cherries species grafted onto one trunk.  I am very excited for the day our little saplings are beautiful trees, and of course for all those delicious cherries. My neighbor told me there is a Chinese proverb about trees... "when is the best time to plant a tree?  20 years ago.  What is the next best time to plant a tree? Right now."