January 2012
The title of this post just about sums up everything I am about to cover. In December, for Josh's birthday I decided to buy him some useful around the house tools. Since we had big plans to build a fence in the spring I thought what better gift then a framing gun and a compressor. For the tool ignorant (pretty much me prior to internet research) these are some big tools. There are many different types of nail guns, again I was not aware. There are framing guns (the big boys that can hold 2-4" nails), roofing guns (a big nailer that is angled to apply shingles), finish/trim nailers which hold smaller nails for finish work, and finally a brad nailer which is the smallest and made for tacking small trim pieces in place. Since we were planning on building a fence, I decided to get the framing gun, I soon learned this weighs about 54lbs. Wow. In addition these nail guns all run on air, so you need to buy a compressor, air tubes and valves. Quick round up to a long winded paragraph about tools, I bought all of these things and they were large, intense and scary. Josh was of course appropriately impressed with my manly gifts.
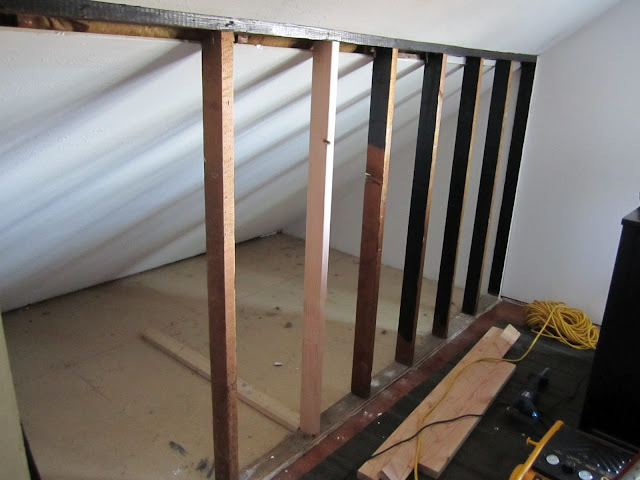
Little did we know, we would be using it even sooner then I thought. For the master bedroom remodel, Josh and I worked on several different schemes for storage in our eaves space. The eventual decision was to make two closets, that book end each side of the wall, leaving space for our existing wardrobe to sit in between. To help support our built-ins we would need to add some framing which we decided to do ourselves. This meant we had to remove several studs to create the openings and add some additional studs and a header above each opening. Since space was tight we decided to use the existing 2x4 wall cap and then sister another 2x4 to it for a header. This gave us a 4x4, we also sistered up the 2x4 wall studs on either side of the opening to make sure we were carrying the weight of the 4' wide closet openings. To those of you with an architectural background this is not exactly 'to code' however, we felt pretty confident that the wall wasn't going anywhere if we removed 4 studs and added 4 somewhere else.
It was relatively easy work, the hardest part was that Josh had to go up and down the stairs to the backyard to cut all the pieces. Unfortunately, in old houses the measure twice cut once is often followed by, cut again, and again. This wall was seriously about of plumb. It was actually leaning into the room by about an in inch and was 1.5" taller near the outer wall. But back to the nailing. We fired up the compressor and went to work with safety goggles in place. It was a huge time saver, our existing 2x4 studs are 80 year old vertical grain doug fir and they have the density of concrete. Honestly, nailing in them is almost impossible, you pretty much have to predrill to get the nail started. Or, you can have a fancy nail gun that shoots the nail into the wood at approximately 182 mph. Which is intense. I tried a few hits and had to two hand the entire thing. It was quickly decided I was the better 'hold it in place' assistant then nail gun operator.
After we framed out the wall we added drywall and mudded our screw holes and joints. We planned on hiring a plaster guy so we didn't worry too much about our finished product. The main goal was to frame the wall, get the drywall up to allow for the built-ins and some electrical work to happen. After our foray into home construction we decided to sit back and let the professionals do what they do best. But hey, we looked good doing it!


No comments:
Post a Comment