Friday, July 20, 2012

The First Step to a Remodel- Downsizing

January 2012

As part of project grown up bedroom, we had to vacate.  With all the dust, contractors, and work to be done we realized it could be upwards of a month before we would be able to use our bedroom again.  This wasn't a huge issue because we had the guest room downstairs.  It was still an issue in many ways.  The room is about half the size of our current room and we needed to get most of our things out of the bedroom whether we needed them or not.


First, we brought down my dresser.  This fit pretty well and would actually be staying downstairs so we didn't have to worry about moving it back up the stairs.  Next, we moved Josh's wire rack of clothes down and squeezed it into the corner.  We then emptied our closet, which amazingly all fit in the downstairs closet. Our bed was too big and difficult to take apart so we decided to leave it upstairs, we did take our foam top (we can't really be expected to live without the foam topper?).  By now the room was increasingly full.  Add to that, the requirement of an entire bed for Gus and it was a tight ship.


 How tight?  Gus was forced to sleep inside the closet, a la Harry Potter.  Honestly, I think he kinda like it.  Snug in there, with all our smells, but I still felt bad, especially when he sad eyed me from in there.  I was expecting to hate it down there.  The small room, my stuff in chaos.  Instead I kinda like it.  The room has great light, was definitely quieter (it is at the back of the house, verses our room in the front), and was only steps from our bathroom.   I could get ready in the morning in half the time.  No trips up and down the stairs for changing, forgotten items, dog walks.  It was pretty nice, similar to a dorm room.  We settled into our snug abode for the long hall and kicked off project with a new trick for us: framing and drywall.


Things to note in these pictures.  The lack of curtains on the West wall(again!).  The shady tacked on curtain on the South wall so we didn't look directly into the neighbor's kitchen.  The large prevalence of Games of Thrones books in the room.  Three books in two months (it was bad).  The fact that I took these pictures at 6:30pm in January and it is that dark in Portland.

Wednesday, July 18, 2012

Project: Grown Up Bedroom

January 2012

Probably the most incomplete room in our house was the master bedroom.  When we first bought the house the sheer size of the bedroom wow'ed us. It's about 17' long and about 14' wide, in modern bedroom standards this is probably a guest room, but for those of you who are old house owners you will know this is a huge bedroom.  That was about all it had going for it.

Issues:

1.  There was no drywall on the entire North side of the room.  The studs were there, doing their job holding up the house, but not protecting us from our creepy eaves space.  
2.  There was no trim in this room.  None.  No baseboards, no door trim, nada.  The wood floors stopped short of the walls and there was a nice empty crevice to collect dog hair and anything else that was swept to the side.
3.  The newer vinyl windows did not open properly and were not trimmed to match the house.  (We actually fixed this when we remodeled the outside, we installed a new working and style matching windows as well as new trim)


4. On the South side we had a weird slider door entrance to the shag den.  See earlier post.  (This was decontaminated and closed up) 
5.  For some odd reason there was a large hole in the wall that showed the chimney stack.  I am not sure what this was for, maybe there was a leak?  Maybe they thought about exposing it? Either way it was ugly and dirty and served no purpose
6. There was one standard 4' closet for all of our clothes.
7. The existing ceiling fan was hideous and brass (we replaced this about a month prior, see earlier post)
8. There were two can lights??? (totally not in keeping with the house, but necessary for lighting purposes) that had no trim on them
9.  The walls were drywall not plaster and did not match the overall look of the rest of the house.


I really should stop now because you're getting the point.  It was bad, real bad.  We lived with this for 18 months.  It was starting to be not cool. The biggest hold up had actually been that we didn't exactly know what to do with the space. We knew we needed more closet space, we also knew we had a lot of space behind the stud wall, and in the creepy chimney recess to add some storage.  Josh and I are by no means carpenters.  If you have ever tried finish carpentry you will know what we mean, it is harder than it looks, and requires a good deal of precise cutting.  We didn't feel confident building in the storage and considering the unlevel, unusual sizes of our house we could not utilize off the shelf items.

The kick start finally came when we were walking Gus.  Each night Josh would run into this women with a large yellow lab mix.  Gus and Baxter liked to wrestle and play and so they often stopped to let the dogs duke it out.  Turns out after talking to her, her husband is a carpenter.  They live three blocks away and his workshop was in the neighborhood.  It was the moment we had been waiting for.  We asked him to come look at the areas before Christmas and give us an idea on pricing.  We drew some quick sketches of two closets in the eaves and a bookcase for the the chimney eaves.  We also asked him to install trim in the room to match our exisiting trim throughout the house. His prices were perfect, right in line with what we thought and his work was amazing!


I was super excited to have a professional handmake things for our house.  It always amazes me to look at our house and think about the hours that went into making the panelled solid wood doors, the dining room built-in, the handmade kitchen cabinets. These weren't 'upgrades,'  they came standard on every house, because that was how you made them. I felt like this was the best way to go.  Pay someone in our own community to make beautiful things in the way they used to be made.  Respect your house, respect craftsman.  Buy local.  Buy Real.  It felt good. 

Wednesday, July 11, 2012

The Dark Place.

January 2012

This post should probably be titled 'I am going in!' a la swat team movie. In our master bedroom we have access to both of the eaves space in the house.  By access I mean, on one side of the room we don't have a wall separating us from it.  On the other side of the room we have a creepy half broken sliding door.  The sliding door side has shag carpeting.  Gross green, matted old stinky shag carpeting.  Considering the fact that the past owner had a cat, who was not so good at litter boxes, I could only imagine what was back there.  For that reason I waited a year and half to actually enter the space.


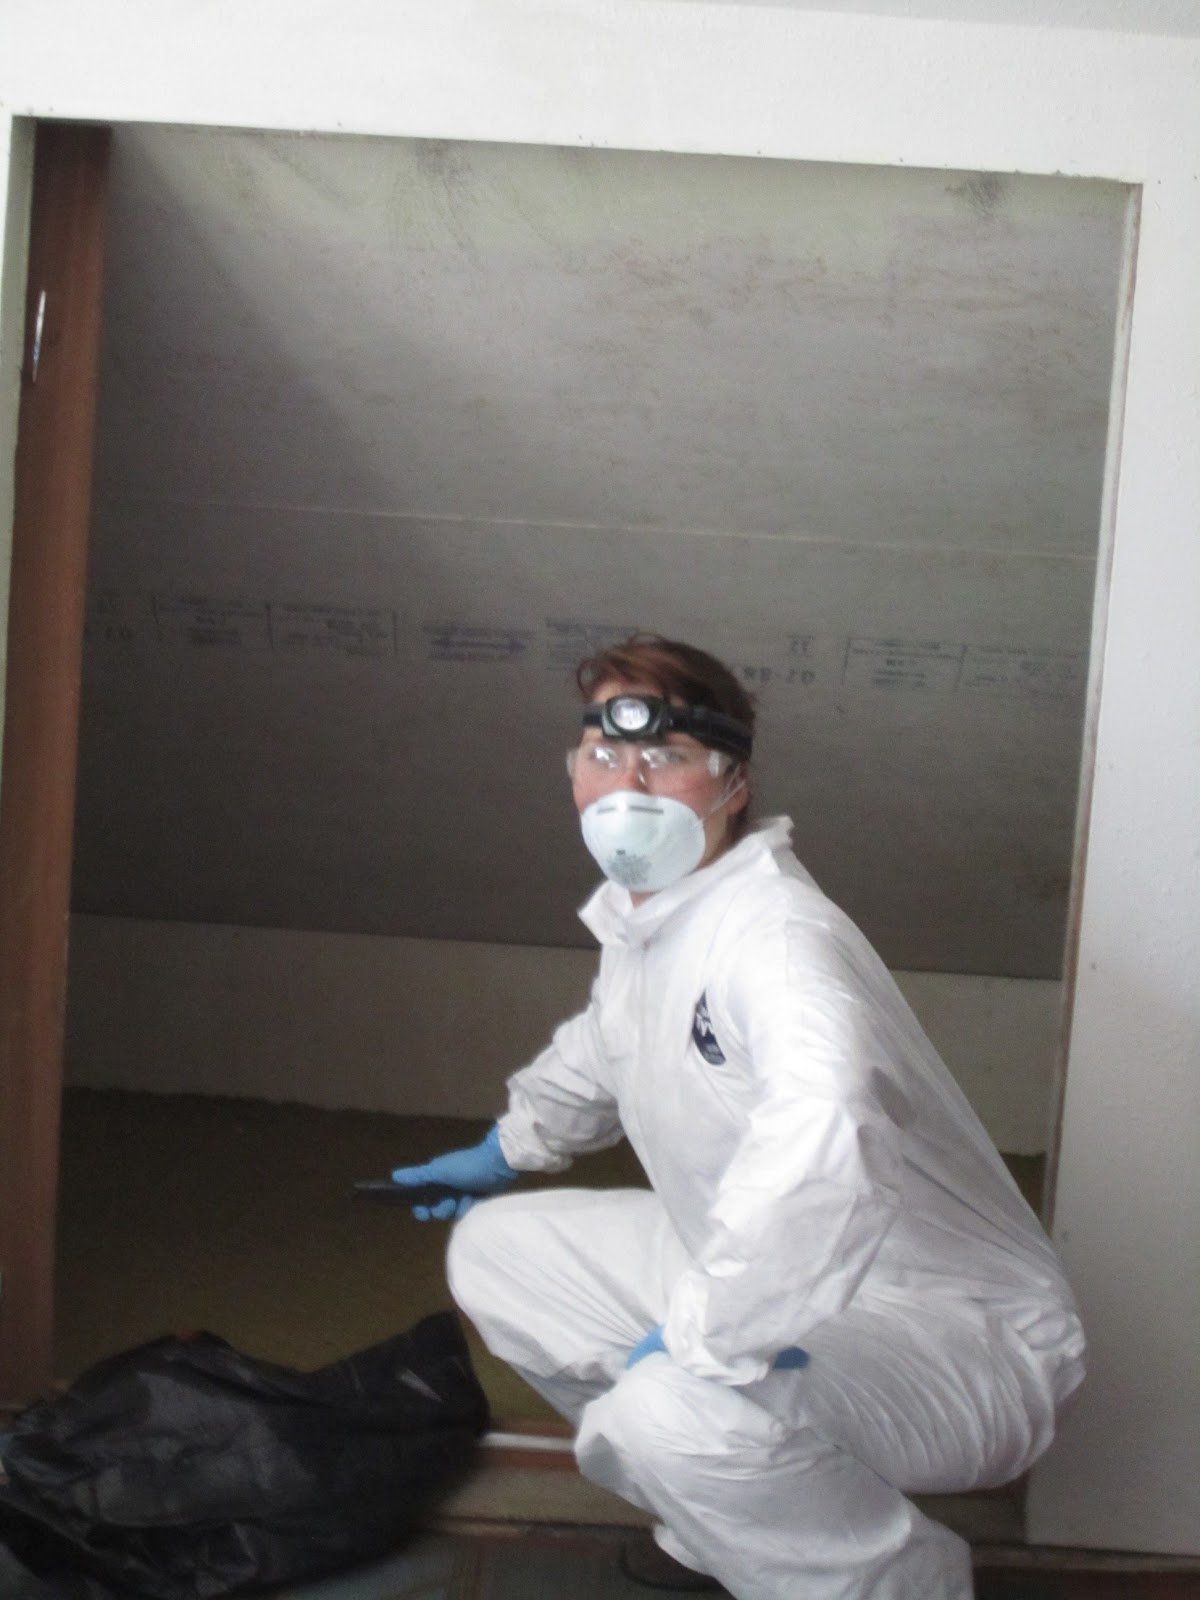
By enter, I mean I put on a tyvex suit, safety glasses, gloves and a head lamp.  I honestly had no idea what was back there, there was no light. Best case scenerio it was old and stinky and maybe had some old bugs.  Worst case scenerio, dead body.  The fact that I slept only about 10 feet from this space is actually pretty amazing.  For the record, I did put furniture in front of the opening to protect myself from any real zombie moments.


Josh and I felt we didn't really need access to the eaves on this side of the house.  We had plenty of storage on the one side and we honestly needed the wall space in the bedroom for our furniture.  We bought a 24" x 24" access panel so that if there was ever an emergency we could still get in there but otherwise would never use it.


But back to the removal. Fully suited up I made a great sight!  Josh documented and after a deep breath I crawled in.  Nothing big to report actually, it was hot, and stinky and pretty dusty.  I used an exacto knife to cut the carpet into ribbons and then put them in trash bags.  It was sweaty work in there and my high level of protective clothing was not breathing. After I removed the carpet I shop vac'ed the whole room and then wipe the space down with clorox.  Phew, house demons banished!  The next week we framed in the slider, installed the access hatch and drywalled the remainder up.  Our house got a little less creepy.

Sunday, July 1, 2012

It's Cold Outside... Let's Install Ceiling Fans?

January 2012

After the new year and a quick trip to San Francisco we buckled down to start a new marathon of projects. The first was to install some Christmas gifts from the family.  Josh asked his mother and I asked my parents for ceiling fans as our big gifts for the year.  We currently have four of the ugliest ceiling fans in man kind history.  These were the brass, oak with a insert of reeding, You know the fans I am talking about, they happen to have graced every home in the late 70's early 80's.  The only difference was you replaced yours, we have not.


For the family room we had two reasons to replace it, one it was ugly and not in keeping with the house.  Two, the room was very dark and has no overhead light, we figured this was a good opportunity to add an overhead light to the space.  I looked for weeks for ceiling fans that match the style of our house, finally I stumbled upon the Period Arts Fan Company.  Super cool, super vintage looking fans, that happen to be built right here in Oregon (bonus!).  We selected the School House Fan, in oil rub bronze with dark cherry blades.  


For the upstairs bedroom, we selected a little more modern/inustrial fan.  Since we have low ceilings upstairs we opted not have a light.  We also have pretty good lighting in the bedroom since there are can lights. We had to order a hugger, which allowed us to hang the fan directly to the ceiling and avoid a rod.  I am serious about the lack of head space, it was tight. We decided to stay with the same oil rub bronze and cherry finish upstairs so there was some consistency. 


While Josh and I have hung most of our fixtures to date, we felt a little nervous about the ceiling fans. These were super heavy, and we weren't entirely sure our wiring would even work with the new fans. We decided to call in an electrician for the work.   We also took the opportunity to add some additional lighting to the basement which was so dark it was almost horror story material.  I lucked out and got some used fixtures from a building remodel so we didn't have to buy any just wire them up!


The electrican was there most of the day and I was sure glad we decided to out source this, he and his partner were grunting and groaning installing these fans.  The living room fan proved extra special since there was no junction box. By the end of the day I had two working fans and 9 additional basement lights, yay! The bad news, it was January and about 40 degrees outside so they fans would just have to sit there looking pretty for a few more months. We really have to work on our timing.

Friday, June 22, 2012

Our Christmas Castle

Christmas 2011


As I have mentioned in the last three posts, we got a chance this year to do Christmas in our house.  For the first time we bought a fresh Noble Fir at our local stand.  Insert, we also had to buy a tree stand, ornaments, Christmas lights, etc.  We also got some fresh cedar garland for the mantel and for around the front door. It was fun putting everything out and about. Small decorations were spread out around the house: vases of red flowers, red bead garlands and some plaid bows. We lite up our lone tree in the front yard and put some lights on the porch. I bought adorable ceramic and twig reindeer to protect our front door and even our buffalo head got a little sprucing up.  


For the mantel, I hung out stockings, added some poinsettias and hung some winter photographs on the wall.  In the dining room, I used our freshly stained built-in top to put up a collection of ceramic snow village houses my mom used to collect.  When I finally bought my own house she let me pick out my favorites and sent them along so I could have my own little village.  This always fascinates people who come to visit, one because they are beautiful and all lite up and two because 26 year olds don't normally collect ceramic Christmas houses.


This was also our first real 'party' at our house.  So we broke out the few nice plates and serving dishes we had.  We set up a drink station in the family room with warm spiced cider and a vintage red coleman cooler filled with wine and beer.  For the first party I made a gluten free cobbler, and a fresh apple pie, we also bought some cookies and a pound cake from Whole Foods.  For the second party we bought a honey baked ham, I made fresh biscuits and cut up fixings.  I made homemade cranberry sauce as well as spinach and artichoke dip. We also made New England clam chowder and served them in espresso cups, which was a huge hit!  It was great to see family and friends and I think we made a good showing!  Happy Christmas!

Monday, June 11, 2012

A Christmas Miracle, Mudroom Vortex Part Deux

December 2011

This year we decided to spend Christmas in Portland, which was super exciting.  It was our first time staying home and would be our first opportunity to really celebrate in the house.  Of course, we could not just sit back and relax?  Apparently working on your house 24/7 doesn't end for the holiday season.  So, Josh and I decided to host a small Christmas party of desserts and drinks.  Then as luck would have it, we offered to be part of our neighborhood progressive dinner party which happened to land the following night December 26.  Yup, that's two parties, two different menus, in two days, gulp.

 
As if this wasn't enough, this would be the first time many of our friends and neighbors had ever seen the house.  Which put the pressure on to finally deal with a lingering project to nowhere: the mudroom.  As you may remember, back in July we installed beadboard in the entire space.  In August, we rented a belt sander and sanded the floor boards.... then nothing happened for a while. Then we sanded the ceiling, only to realize we had to skim coat it again, so we sanded it again.  Are you seeing where I am going?

Well it was a little over a week to Christmas and we needed to at least make the room presentable.  We primed the entire room and set about painting all the walls, trim and ceiling a nice fresh white semi-gloss.  One coat went up, then two, the wood was soaking all the paint up like sponge, I seriously didn't know if I could keep painting the same space every night like this.  Finally, we tried a third coat, it had to be deemed good enough and we stopped at four coats of paint.  This made a huge difference in the room!  So bright and so fresh.  We were excited and couldn't wait to paint the french doors. Except we soon realized they had to be open to painted?!? Since it was about 30 degrees and rainy in Portland these doors were not getting painted anytime soon.  Total fail on our part.  We had three months of perfect weather in which to paint the doors and well... it looks like it would be almost a whole year before it happened.  So please ignore the ugly preprimed beige doors.

 
I will take a break from this failure to show you a picture of our amazingly cute sconce we added to the mudroom.  Prior to this addition there was no light in the space, not one.  Making trips to the basement or outside at night was an 'at your own risk' adventure.  Then I saw this little guy and decided he should come home with me (I am glossing over the fact we had to bring in a electrician to actually make it light up). But that aside, its adorable and I love him every time I go down to the basement without tripping and dying.

 
With the door failure looming we decided to paint the floor.  I primed the bare floor boards, which kinda gave it a fun whitewash effect and then Josh painted the floor with crisp porch paint. Two coats, one of which was done on Christmas Eve.  Yes, we painted the mudroom floor on Christmas Eve, Josh was at until 9pm.  Fumes be damned this would be our Christmas miracle! We pulled it off and shared a glass of wine before passing out.  Now I just needed to start contemplating two parties to cook for. 

Friday, June 8, 2012

Neighbors, we now have curtains. You're welcome.

November 2011
We spent the remainder of 2011 doing small but totally satisfying projects.  This was going to be our first real Christmas in the house and I was a little excited, o hell, I was VERY excited.  But along with the excitement came the o my goodness feeling.  We had nothing in the way of Christmas decor.  Everything had to be bought: tree stand, tree lights, ornaments, general all over flare.  In preparation for this we stepped back our remodeling.


We decided in November to tackle a small project which should have been done when we first moved in... curtains.  Yes, we have now lived in the house over a year and a half and currently own/hung zero window treatments.  This makes for some interesting moments.  I change in our upstairs hallway, to avoid changing in our curtainless bedroom, we also try to monitor our family room tv viewing since there are no curtains, HBO you're out.  I know to many people this is unimaginable, but honestly, I kinda hate curtains.   I love a nice open window letting our little bit of Portland sunlight in. It's also super annoying to daily open and close them, which means sometimes they are left closed even when you want them open... big bummer.

But the point of the story is, we finally got curtains for the family room and dining room.  Since the rooms open on to each other we decided that we should use the same ones in both rooms.  This limited our choices dramatically since the rooms were different colors.  We went towards solid neutrals.  We finally decided on some khaki grommet type neutral numbers from Plow and Hearth.  They were super cheap and apparently they have thinsulate in them.  Apparently, when we pull them they can actually act like a layer of insulation... I am not quite sure about this but it was worth a shot with our drafty windows. 

I ordered the curtains and then...they sat in the guest room for over a month.  The next step was picking curtain rods. This was also quite a process.  To start I hate finials, so we had to find curtain rods without finials on them.  I finally found ones I really liked at Pottery Barn.  They were more than I wanted to spend, but they seemed really solid and didn't have a huge ball, or ornate spike in site.  After a couple of misfires I ordered them online and went about ironing 4 7'x5' panels.  Phew.

We decided one Sunday to install them.  This was a bit of trial.  Since I chose grommet top curtains and these rods had integrated brackets we had to hang the curtains on the rod and then screw it into the wall.  So much for cleaning them once a year.... Since we had plaster walls we had to carefully predrill and then install some plastic anchors into the wall.  This is definitely a two person job.  The rod has to be held, curtains rangled and the screws often did not exactly go in 'easily.'  In the end, we got pretty good at it and we stood back to look at our handy work.  Wow, it did make a difference!  The rooms felt more warm and lived in.  I now had to admit we might need curtains.  I am also sure the neighbors were very happy.